IntelliJ Configuration
Preparation: Install IntelliJ
Get a JetBrains Ultimate License. For students: Visit https://www.jetbrains.com/student.
Install JetBrains Toolbox:
choco install jetbrainstoolboxandchoco pin add -n jetbrainstoolbox, because JetBrains does an auto updateInstall “IntelliJ IDEA Ultimate” using the JetBrains Toolbox.
Preparation: Build Winery
Build Winery to have all dependencies fetched by Maven: mvn clean install -DskipTests.
Setup IntelliJ
At start of IntelliJ, browse to the root
pom.xmland open it as project.Enable checkstyle: Follow the shown steps and apply them in IntelliJ
Install the IntelliJ Checkstyle Plugin. It can be found via plug-in repository (Settings -> Plugins -> Browse repositories)
Open the Settings (by pressing Ctrl + Alt + S)
Go to Other Settings -> CheckStyle.
Click on the green plus and add
checkstyle.xmlfrom the root of the Winery code repository.
Configure the code style
Open the Settings (by pressing Ctrl + Alt + S)
Go to “Editor > Code Style”
Click “Manage…” (right of “Scheme:”)
Click “Import Scheme”
Choose “IntelliJ IDEA code style XML”
Navigate to
intellij-idea-code-style.xml. It is located indocs/config/IntelliJ IDEA.Press “OK”
You will see a message “Winery configuration settings were imported”.
Press “OK”
Press “Close”
Press “OK”
Setup code headers to be inserted automatically
Open the Settings (by pressing Ctrl + Alt + S)
Go to Editor > Copyright > Copyright Profiles
Click the green plus
Name “Winery”
Copyright text from Source Code Headers
Go to Editor > Copyright > Formatting
Adjust copyright formatting settings
Change to
Use block commentswithPrefix each lineSet
Relative LocationtoBefore other commentsIncrease
Separator before/after Lengthto81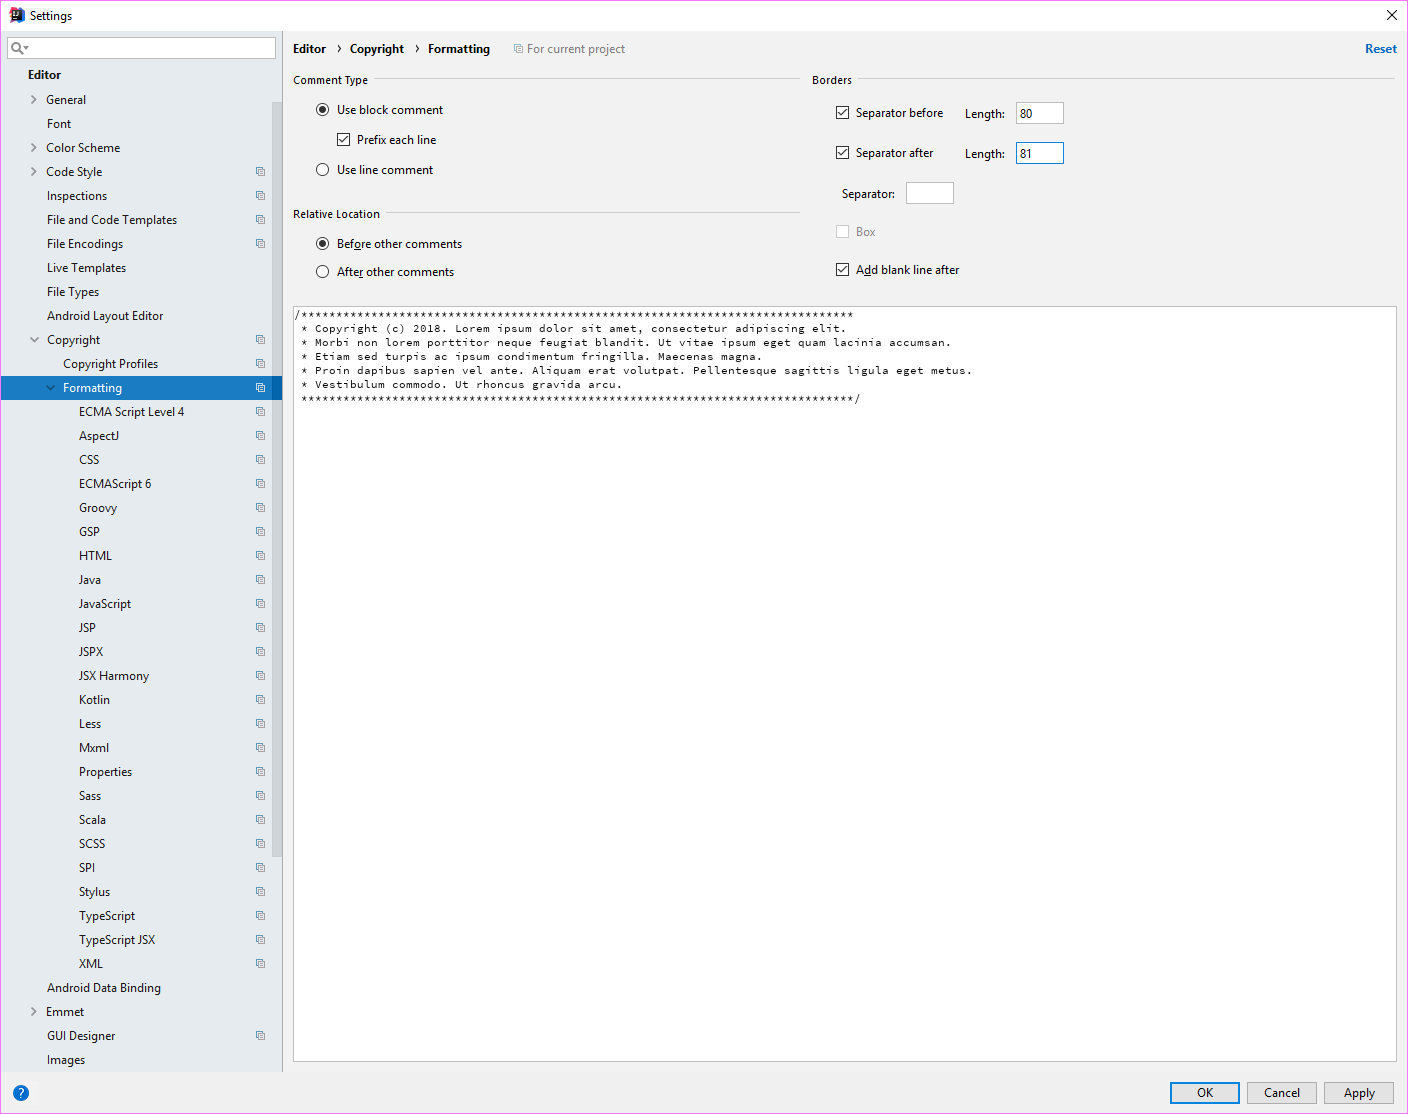
Go to Editor > Copyright
Set “Winery” as Default project copyright
Press “OK”
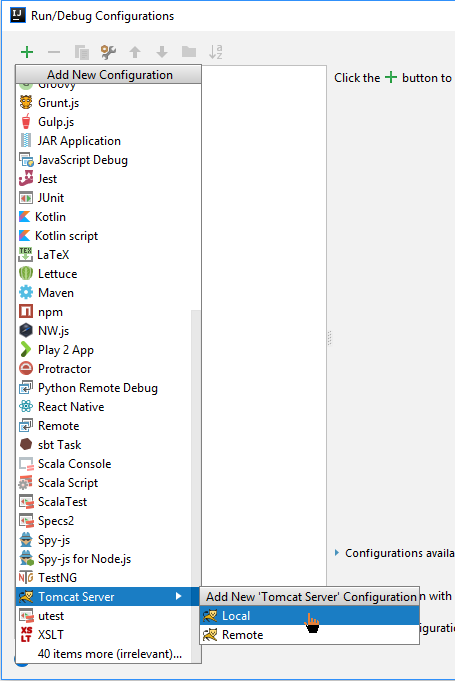
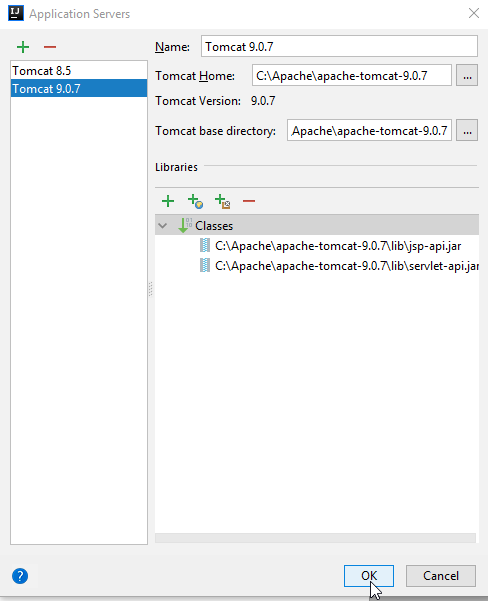
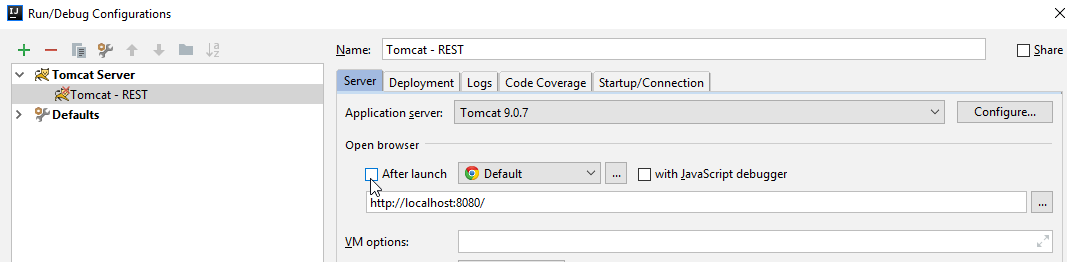
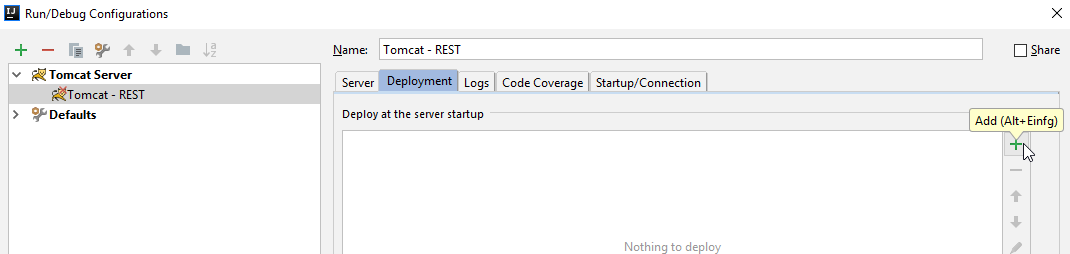
Setup Apache Tomcat
Download Tomcat 9.0 from https://tomcat.apache.org/download-90.cgi. Choose “zip” (e.g., http://mirror.synyx.de/apache/tomcat/tomcat-9/v9.0.7/bin/apache-tomcat-9.0.7.zip).
Extract it to
c:\apache. Result:C:\apache\apache-tomcat-9.0.7.


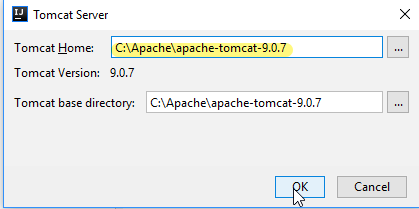
Press OK
Set name and no browser launch:
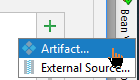
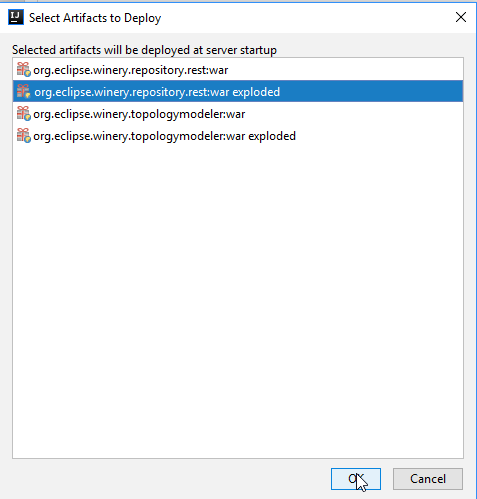
Add deployment artifacts:
Set
/wineryas application context:
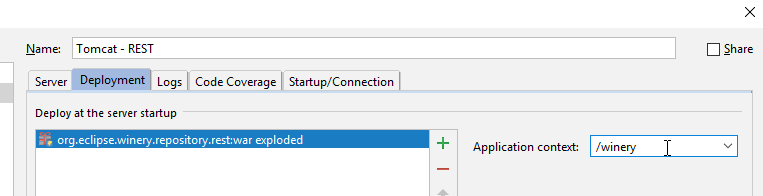
Click “Apply”
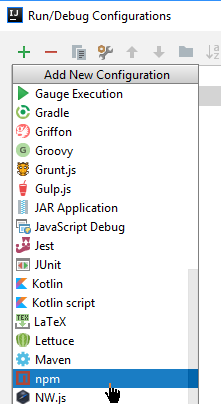
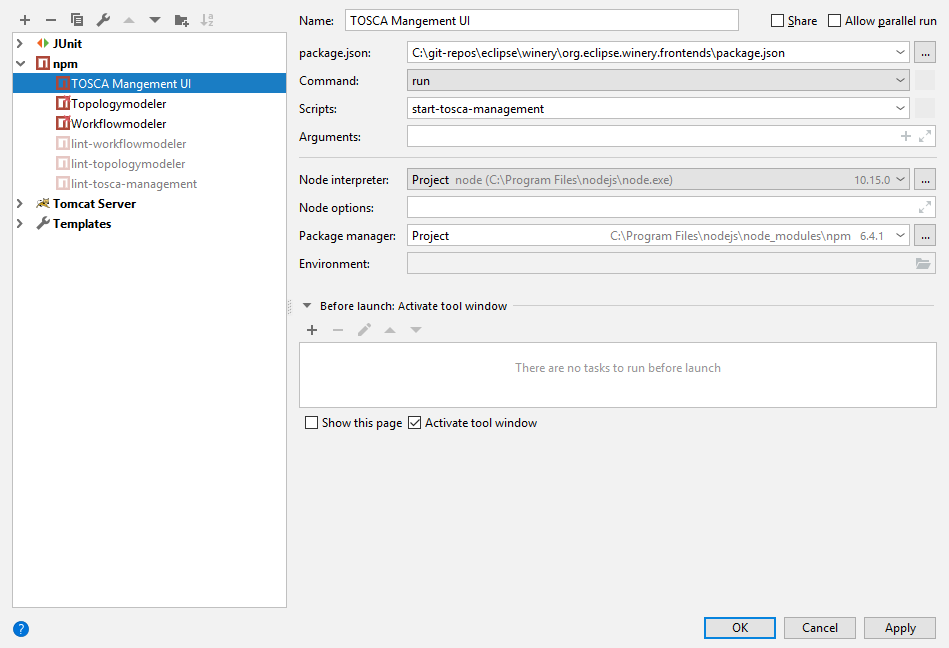
Setup npm run for TOSCA Management UI
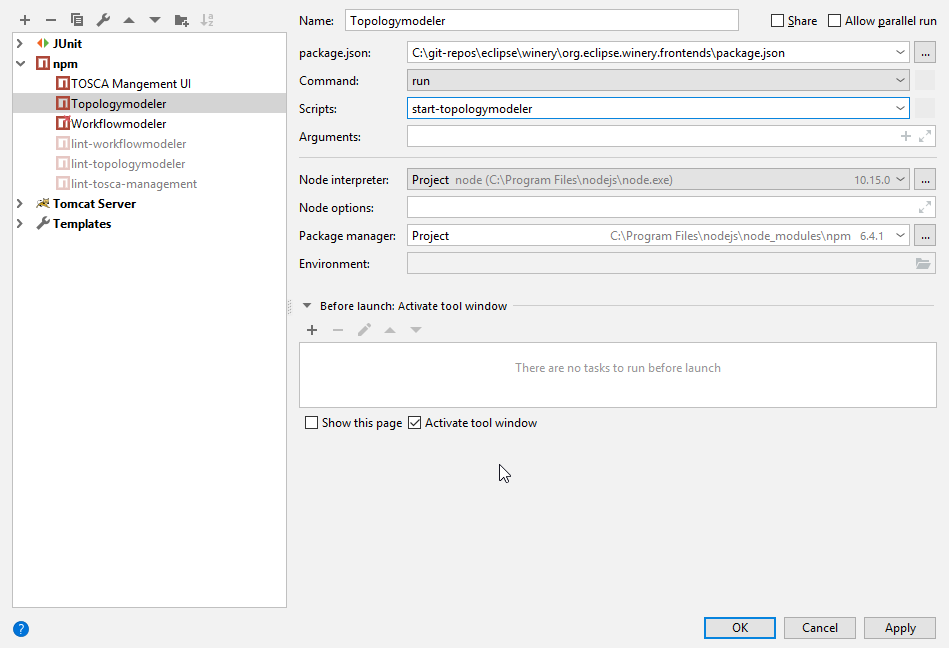
Setup npm run for Topology Modeler
Setup npm run for Workflowmodeler (BPMN4TOSCA Modeler)
Optional: Setup XSD validation for TOSCA files
Open the Settings (by pressing Ctrl + Alt + S)
Go to “Languages & Frameworks”
Select “Schemas and DTDs”
Click on the plus on the right at “External Schemas and DTDs”
Enter
http://docs.oasis-open.org/tosca/ns/2011/12as URIIn “Project Schemas” search for
TOSCA-v1.0.xsd. It should be located at “org.eclipse.winery.common”.
In the case of openingC:\winery-repositoryin IntelliJ, you have to select enterC:\git-repositories\winery\org.eclipse.winery.common\src\main\resources\TOSCA-v1.0.xsdin the Field “File”Click “OK”.
Go to “Editor”
Select “File Types”
At “Recognized File Types”, scroll down to XML
Select “XML”
At “Registered Patterns”, click on the Plus
Enter
*.toscain the popup.Click “OK”
Click “OK”
Optional: In case you do not want to have the live-update of Angular, you build the WARs of the UI and then deploy as follows:
External artifact
.../org.eclipse.winery.frontends/target/tosca-management.warto/External artifact
.../org.eclipse.winery.frontends/target/topologymodeler.warto/winery-topology-modelerExternal artifact
.../org.eclipse.winery.frontends/target/workflowmodeler.warto/winery-workflowmodeler
Run everything
Select “Winery - REST”. Click on “Play” (the green rectangle)
Select “TOSCA Mangement UI”. Click on “Play”
Select “Topolgoy Modeler”. Click on “Play”.
Open http://localhost:4200 in your browser.
Demonstration: Open winery-repository (AKA tosca-definitions) in IntelliJ
This ensures that you can work with the TOSCA files using the IDE.Go to File -> Open…
Enter
c:\winery-repositoryClick “OK”
At the dialog “Open Project” choose “New Window”
Expand
winery-repository(on the left side)Expand
nodetypesExpand
http%3A%2F%2Fplain.winery.opentosca.org%2FnodetypesExpand
NodeTypeWithTwoKVPropertiesDouble click
NodeType.toscaGo to line 14
Type in
<See that
<tosca:CapabilityDefinitionsand othertoscaelements are proposedNo further action required. You can close the window.


Further Remarks
Please let
.editorconfigoverride the settings of IntelliJShortcuts
2x Shift / Ctrl+Shift+F / Ctrl+F: Differrent forms of search
Ctrl+Alt+L: Organize imports (fixes checkstyle)
Ctrl+X: if nothing is marked: cut line (equal to marking whole line and using Ctrl+X)
Ctrl+Shift+T: Create/jump to the test class
See Update Copyright Header for updating old copyright headers